MAP2080 Primary power supply output power boundary is off for one PPS

An output power boundary is off. Either the power boundary Enable/Disable switch is in the Disable position or the power module has a failure.

MAP2080 Section-1

Procedure

  1. Determine the location of the failing primary power supply (PPS) by using the location code that is listed in the problem FRU list. Refer to MAP1245 Finding FRUs by using location codes.
  2. At the rear of the rack, find the failing PPS module by observing the LED on each PPS module. The LED is green if there is no problem. The LED is amber or off if there is a failure.

    Are any LEDs amber or off?

    • Yes, go to step 3.
    • No, the failure is not occurring at this time. To verify this, return to the repair process screen and do a pseudo repair of the next PPS FRU listed.

      As part of the pseudo repair, all the cables must be disconnected from the PPS when directed. The PPS will not be removed or replaced. Refer to MAP2600 Pseudo FRU exchange needed to reset existing FRU.

    Figure 1. LEDs on the PPS sequencer module
    LEDs on the sequence module
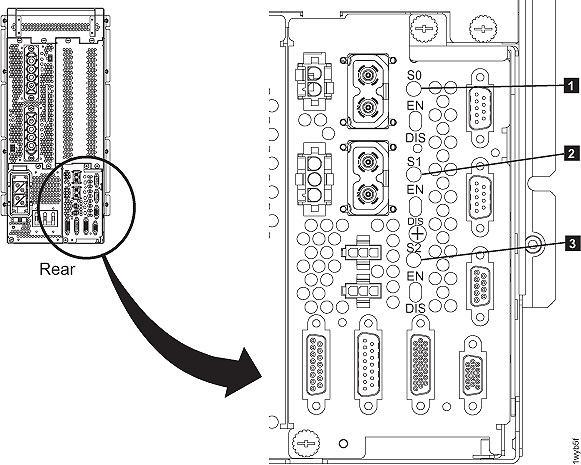
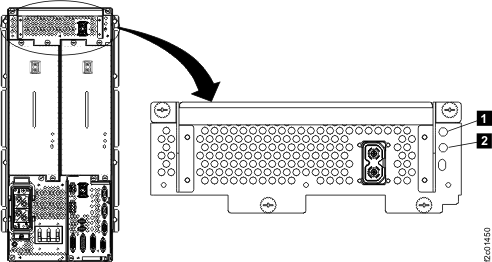
    Figure 2. LEDs on the 208VDC power module
    LEDs on the 208VDC power module
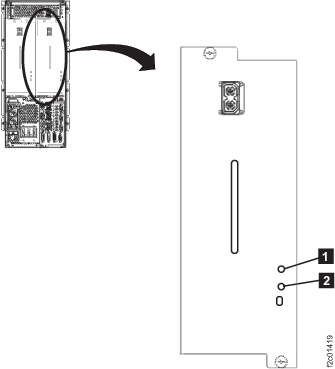
    Figure 3. LEDs on the booster power module
    LEDs on the booster power module
  3. Observe the Enable/Disable switch on the PPS FRU with the LED lit amber or off.

    Is the switch in the Disable position?

    • Yes, go to the next step.
    • No, return to the repair process screen and continue the repair by selecting the next FRU on the list.
      1. Read all of the following substeps before you continue to the next step.
        Optional: If you want to view this MAP in a separate information center window that will remain open, click Help in the upper right corner of the main HMC GUI screen and navigate to MAP2080.
      2. Click Close in the current service information window (that is, this window).
      3. One or more HMC repair screens will prompt you for the result of using the service procedure in the MAP. Select Problem not fixed
      4. Select No when prompted for whether you exchanged any parts.
      5. Select No when prompted for whether you isolated the problem.
      6. Select the FRU to be repaired from the FRU list. Click Next.
      7. The HMC begins the FRU exchange process for the selected FRU.
  4. The Disable switch was set to off. Set the Disable switch to the Enable position.

    Did the LED become lit green?

  5. Return to the repair process screen to continue the repair.
    1. Read all of the following substeps before you continue to the next step.
      Optional: If you want to view this MAP in a separate information center window that will remain open, click Help in the upper right corner of the main HMC GUI screen and navigate to MAP2080.
    2. Click Close in the current service information window (that is, this window).
    3. One or more HMC repair screens will prompt you for the result of using the service procedure in the MAP. Select Problem not fixed.
    4. Select No when prompted for whether you exchanged any parts.
    5. Select No when prompted for whether you isolated the problem.
    6. Select the PPS from the FRU list. Click Next.
  6. You will now perform a pseudo repair of the PPS.
    Note: A pseudo repair means you use the guided process for replacing the PPS but do not actually replace the PPS FRU. The purpose of the pseudo repair is to cause a reset of the FRU hardware so it can be returned to proper status.
    After the Information Center PPS parts exchange process is displayed, do the following:
    1. Disconnect the cables in the order specified.
    2. When all cables have been disconnected, this ensures that the PPS internal error conditions are properly reset.
    3. Do not remove any PPS modules when directed.
    4. Reconnect the cables in the order specified.
    5. Continue the repair as directed in the last step of the procedure.