Exchange the CEC enclosure system processor card
Before you begin
 Use approved ESD procedures to prevent damage.
Attention:
- This procedure is not a stand-alone procedure. Customer disruption and damage to the hardware might occur when microcode and power boundaries are not in the proper conditions for this service action.
- If a serviceable event FRU repair directed you to this procedure, the microcode and power boundaries are already set.
- If a serviceable event FRU repair did not direct you to this procedure, see MAP1230 Replace a FRU without using a serviceable event.
Notes:
- All the cables and FRUs to be removed must be uniquely identified so they can be reinstalled correctly.
- If an installed earthquake resistance kit prevents you from accessing this FRU, refer to MAP1600.
Remove the system processor card
Procedure
- At the rear of the storage facility, view
both CEC enclosure power supplies.
Figure 1. CEC enclosure DC good LEDs 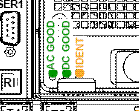
Are both DC GOOD LEDs flashing?
- Yes, continue with the next step.
- No, do not continue with this FRU replacement. Go to MAP4840 CEC enclosure fails to power off during CEC enclosure parts exchange to fix the problem with the CEC enclosure not being in the power off state.
- Remove
all power from the CEC enclosure.
- At the rear of the CEC enclosure, disconnect the power input cables
 to both CEC enclosure power supplies.
 - At the CEC enclosure control panel, observe
the green Power® Present icon,
beneath the white Power button.
- If it is slow flashing, the CEC enclosure is still in the power-off state. DO NOT CONTINUE. Ensure that you have unplugged the power cables.
- If it is off, go to the next step.
Figure 2. CEC enclosure (rear) 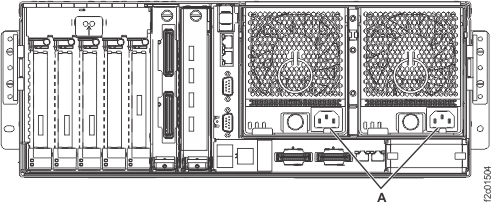
- At the rear of the CEC enclosure, disconnect the power input cables
- At the front of the CEC enclosure, remove the control panel by pressing the
locking tabs located on either side of the panel, grasping the edges of the panel, and pulling it out of
its bay
 .
See Figure 3.
.
See Figure 3.Figure 3. Removing the CEC enclosure control panel 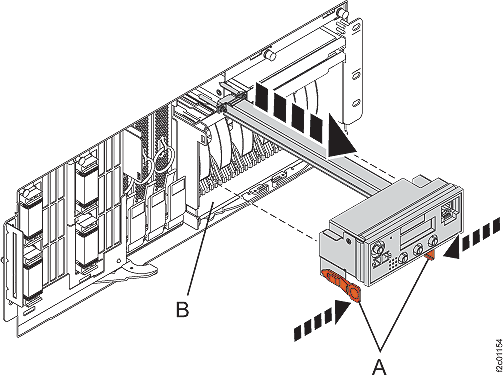
- Remove all system processor voltage cards. See Figure 4.
- Squeeze the top of the latch to release it.
- Rotate the latch out and then down.
- Grasp the pull ring and slowly pull the system processor voltage card out of the enclosure.
Attention: Pulling the system processor voltage card out of the card enclosure requires a large amount of force. The system processor voltage card is of substantial weight, so grasp it firmly when it is free of the card enclosure.Figure 4. Removing the system processor voltage card 
- Unlock the system
processor backplane assembly and then pull it out of the CEC enclosure using
both hands. See Figure 5.Attention: The system backplane assembly weighs 35 lb and should not be pulled out using the blue lever. Grasp the backplane assembly firmly with both hands when it is free of the system.
Figure 5. Removing the system processor backplane assembly 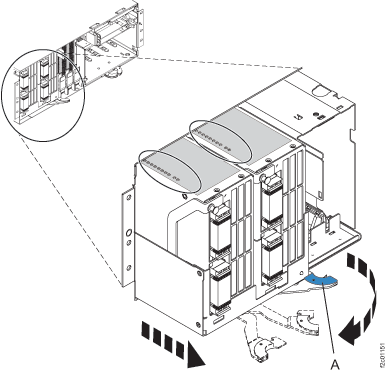
- If you are removing the processor backplane because of
a system failure, look at the LEDs (shown
in Figure 6) located
on the top of the processor card assembly to identify the failing
processor location.
If you used the service action log, Advanced System Management Interface (ASMI), or HMC to activate the identify function prior to removing the processor backplane, the LEDs located on the top can be illuminated to identify the failing processor card.
To illuminate the location LED for the failing processor, press the LED actuator button
(shown in Figure 6) located on the
right side of the assembly. Attention: The actuator button must be used within 20 minutes after the system backplane assembly is removed from the system. The assembly retains the energy to light the LEDs for 40 seconds after the actuator button has been pressed.Figure 6. LED actuator button 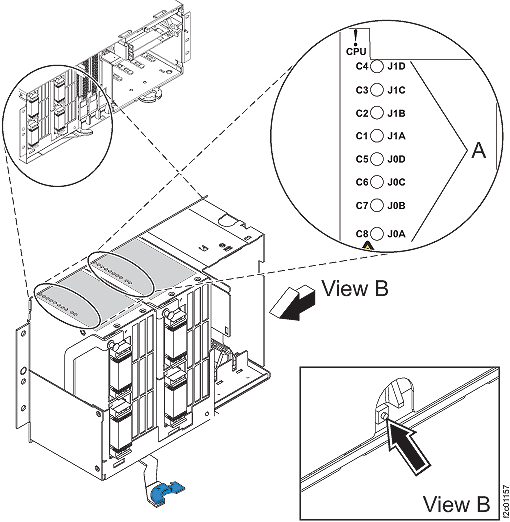
- Remove the system processor
card assembly.
- Unscrew the two blue thumbscrews, pivot the processor
alignment face plate out, and then remove it.
Figure 7. Removing the processor alignment face plate 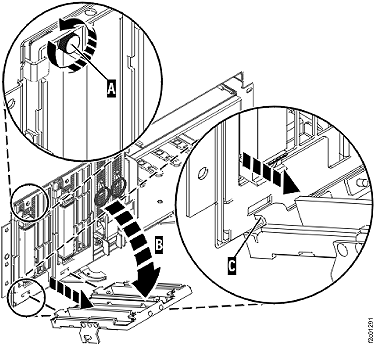
- Pull the locking knobs out to the unlocked position.
- Push the locking arms down and out to unlock the processor
card assembly.
- Lift the processor card assembly
 out of the system backplane assembly.
Figure 8. Removing the system processor card assembly from the backplane assembly 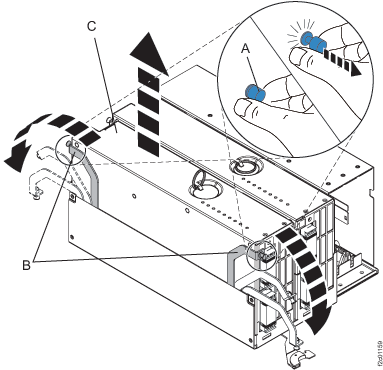
- Unscrew the two blue thumbscrews, pivot the processor
alignment face plate out, and then remove it.
- Remove the system processor
assembly cover.
- Loosen the two retaining knobs on the processor card assembly and
then lift the cover off of the assembly.
Figure 9. Removing the cover of the assembly 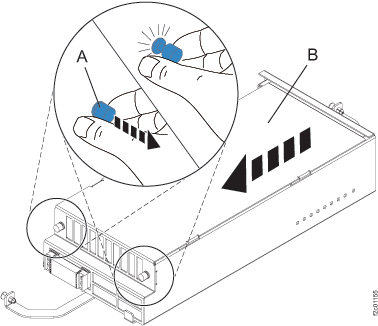
- Loosen the two retaining knobs
- Remove the memory DIMMs so
they can be installed on the new system processor card.
- Unlock the memory DIMM by pushing the connector tabs out and then down. The tabs' lever
action forces the memory DIMM out of the connector.
- Lift the memory DIMM out of the connector.
Figure 10. Removing the memory DIMM 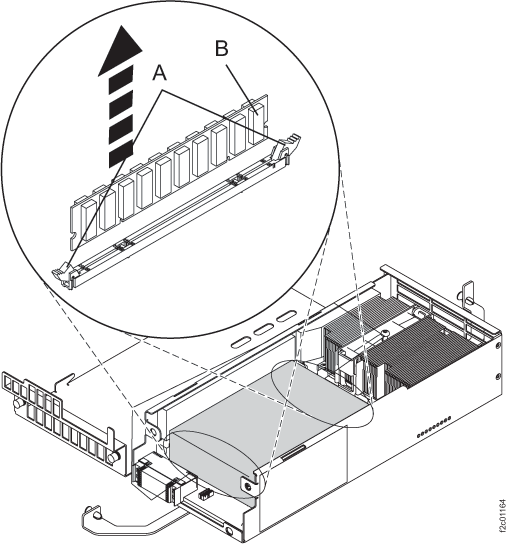
- Unlock the memory DIMM by pushing the connector tabs