Connecting the power control cables to power on the rack
About this task
Attention: After the RPC cables from this rack have been connected, DO NOT switch off or
remove power to this expansion rack for any reason.
Procedure
-
At the rear of the expansion rack being installed, find the power control cables that connect
to the left and right DC-UPS connectors Ex-J6 and Ex-J7. See Figure 1 or Figure 2. The cables are normally found
bundled together at the rear of the expansion rack.
Figure 1. Location codes for the DC-UPS (Models 98x and 8xE, single-phase power) (rear) 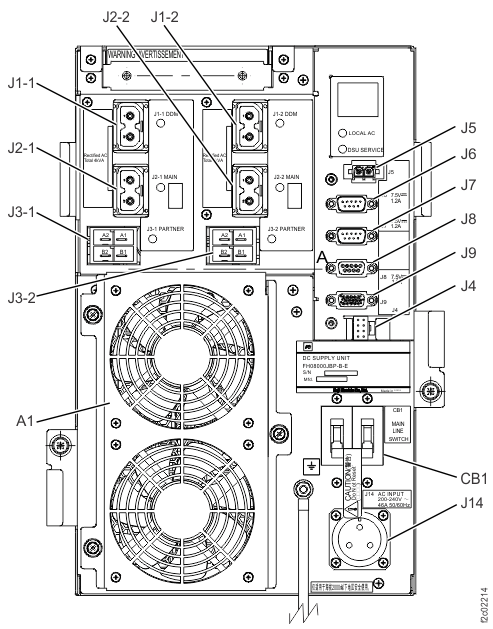
Figure 2. Location codes for the DC-UPS (Models 98x and 8xE, three-phase power) (rear) 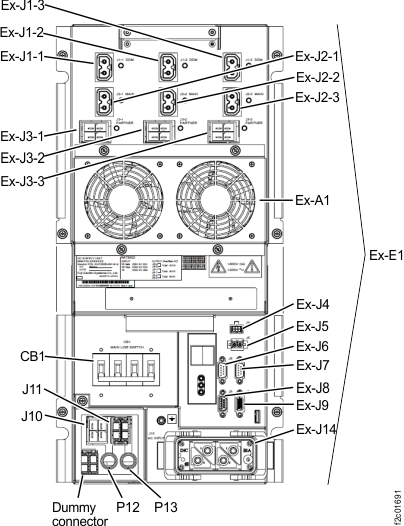
-
Route both expansion rack power control cables to the RPC cards at the left rear and right rear
of Rack-1.
-
In Rack-1, route the expansion rack power control cable labeled R1-C2-P2xx down the right side
wall to R1-C2. See 2 in Figure 4 and C2 in Figure 5. Do not connect the cable until
directed in the next step.
Figure 3. Routing rack-to-rack power control and optical cables across a rack (earlier model shown, routing for models 98x and 8xE similar) 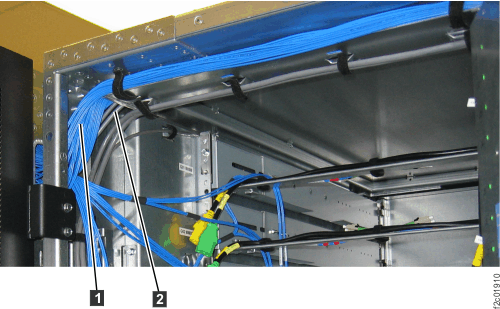
Figure 4. Routing remote power control cables and FC-AL cables between racks Note: Models 984 and 84E shown, routing for other models is similar.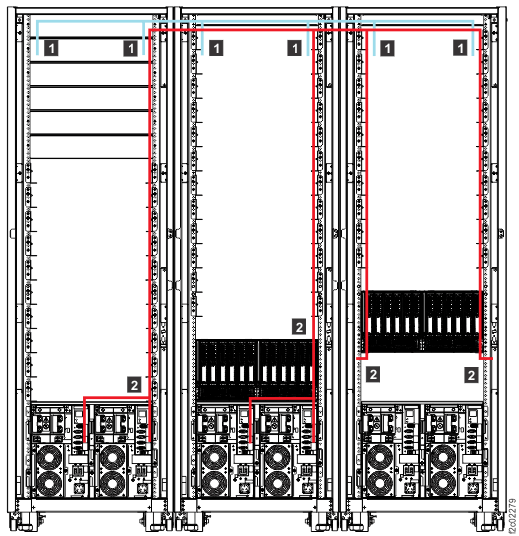
Figure 5. Model 984, 985, 986, 988 base rack locations Note: Rack-1 shown. PJAs E51, E52, E53, and E54 can also be present in Rack-2. DC-UPS locations are similar for models 98x and 8xE.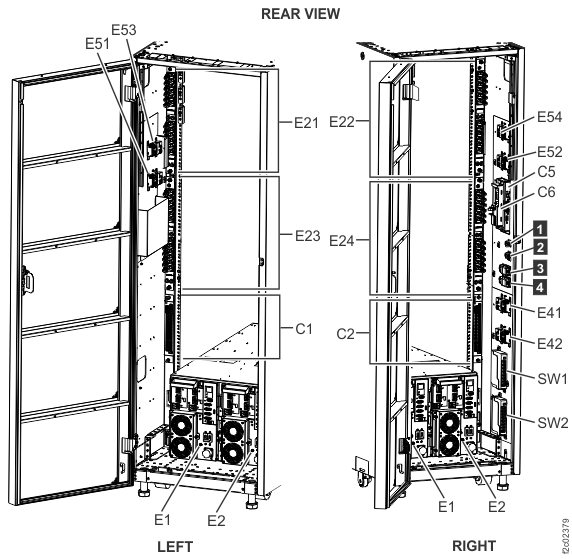
-
In Rack-1, route the expansion rack power control cable labeled R1-C2-P2xx down the right side
wall to R1-C2. See 2 in Figure 4 and C2 in Figure 5. Do not connect the cable until
directed in the next step.
-
Use Table 2 and Figure 6 to determine which RPC-2 card connector to plug the
expansion rack power control cable to. Connect the cable to the RPC card.
Table 1. Rack number and RPC-1 connector locations From DC-UPS connector Ex-J6 in rack number: To Rack-1 RPC-1 card (left, facing rear) 2 C1-J203 3 C1-J205 4 C1-J207 5 C1-J209 Table 2. Rack number and RPC-2 connector locations From DC-UPS connector Ex-J7 in rack number: To Rack-1 RPC-2 card (right, facing rear) 2 C2-J203 3 C2-J205 4 C2-J207 5 C2-J209 Figure 6. Location codes for the RPC card (Model 98x) 