Exchange the microbay
This procedure guides you on how to remove and replace the microbay.
Before you begin
 Use approved ESD procedures to prevent damage.
Attention:
- This procedure is not a stand-alone procedure. Customer disruption and damage to the hardware might occur when microcode and power boundaries are not in the proper conditions for this service action.
- If a serviceable event FRU repair directed you to this procedure, the microcode and power boundaries are already set.
- If a serviceable event FRU repair did not direct you to this procedure, see MAP1230 Replace a FRU without using a serviceable event.
Notes:
- All the cables and FRUs to be removed must be uniquely identified so they can be reinstalled correctly.
- If an installed earthquake resistance kit prevents you from accessing this FRU, refer to MAP1600.
Remove the microbay
Procedure
-
At the rear of the rack, ensure that the SAS, power, and PCIe cables are properly labeled and
then disconnect them from the microbay that is being removed. Leave the cables fastened to the cable
tray behind the microbay. See Figure 1.
- Disconnect the four SAS cables from ports T1, T2, T3, and T4. Gently pull the release handle and then unplug each cable.
- Disconnect the power cable from port T6.
- Disconnect the PCIe cable from port T7. Gently pull the release handle and then unplug the cable.
Figure 1. Microbay location codes 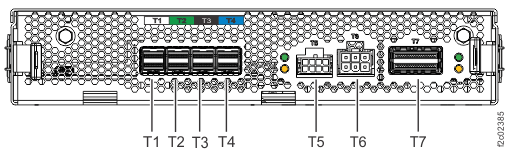
-
Remove the cable tray, with cables attached, from the rear of the microbay. See Figure 2.
-
Loosen, but do not remove, the mounting screws
 at the sides of the cable
tray.
at the sides of the cable
tray.
-
Slide the cable tray to the left to clear the screws, then to the rear to remove.
Figure 2. Microbay cable tray 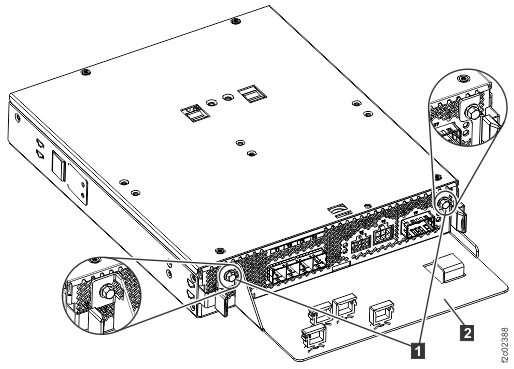
-
Loosen, but do not remove, the mounting screws
-
Remove the microbay from the microbay tray. See Figure 3.
-
Press the release tabs toward the center of the microbay.
-
Release the service latches
 and
and  from the outside of the tray,
then remove the microbay.
from the outside of the tray,
then remove the microbay.
Figure 3. Microbays C1 (left, in operating position) and C2 (right, in service position) 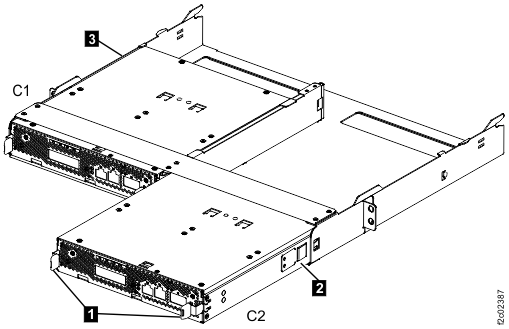
-
Press the release tabs
Install the microbay
Procedure
-
Slide the microbay into the microbay tray. See Figure 3.
-
Release the service latches and , as needed to insert the
microbay.
-
Ensure that the release tabs latch into the microbay tray.
-
Release the service latches
-
Fasten the cable tray, with cables attached, to the rear of the microbay. See Figure 2.
-
Slide the cable tray mounting slots onto the mounting screws on the microbay.
- Tighten the mounting screws.
-
Slide the cable tray mounting slots onto the mounting screws