Exchange the main line power cable

Before you begin

Icon for electrostatic discharge wrist strapUse approved ESD procedures to prevent damage.

Attention:
  • This procedure is not a stand-alone procedure. Customer disruption and damage to the hardware might occur when microcode and power boundaries are not in the proper conditions for this service action.
  • If a serviceable event FRU repair directed you to this procedure, the microcode and power boundaries are already set.
  • If a serviceable event FRU repair did not direct you to this procedure, see MAP1230 Replace a FRU without using a serviceable event.
Notes:
  • All the cables and FRUs to be removed must be uniquely identified so they can be reinstalled correctly.
  • If an installed earthquake resistance kit prevents you from accessing this FRU, refer to MAP1600.

Remove the main line power cable

Procedure

  1. To locate this FRU, take one of the following actions and then return here and continue to replace the FRU:
    • If this FRU has a FRU identify indicator, use the FRU identify indicator, which is listed in MAP1240 Locating FRUs by using identify indicators. If not, use the location code.
      Note: There might be cases where the FRU failure or fencing conditions prevent the FRU LED indicator from being lit even if the FRU has power.
    • Use the location code, which is listed in MAP1245 Finding FRUs by using location codes.
    • If there is no FRU identify indicator or location code, you were sent here by an isolation MAP or symbolic FRU procedure. Use the information in that procedure and the figures in this procedure to locate the proper part to exchange.
  2. Most, but not all, FRUs have identify indicators. Use the flashing amber or solid blue FRU identify indicators to ensure that you are working on the correct enclosure or FRU.
  3. Instruct the customer to switch off the circuit breaker that supplies mainline ac voltage to the power receptacle for the main line power cable you are replacing.
  4. Attention: Use lockout and tagout procedures as defined in the Electrical Safety for IBM® Customer Engineers.
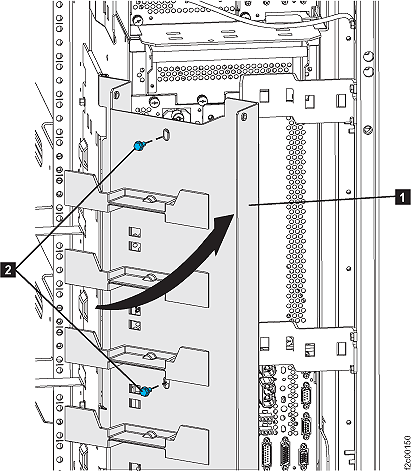
  5. Remove the two screws Callout label 1 and open the 208VDC bus bar gate to the service position.
    Figure 1. 208VDC bus bar gate service position
    Pivoting the 208V bus bar gate to service position
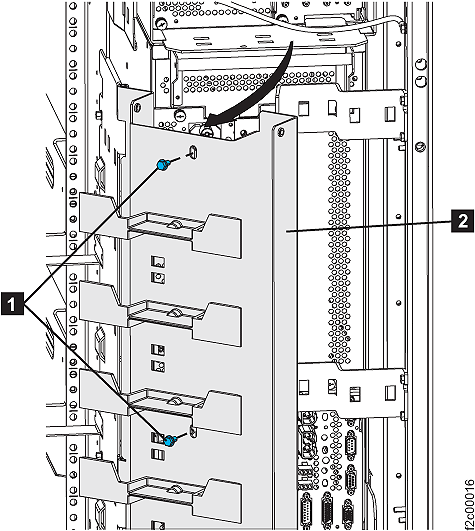
  6. Ensure the Primary Power Supply (PPS) MAIN LINE CB00 Callout label 1 is switched off.
    Figure 2. Power supply main line CB00 switch
    Power supply main line CB00 switch
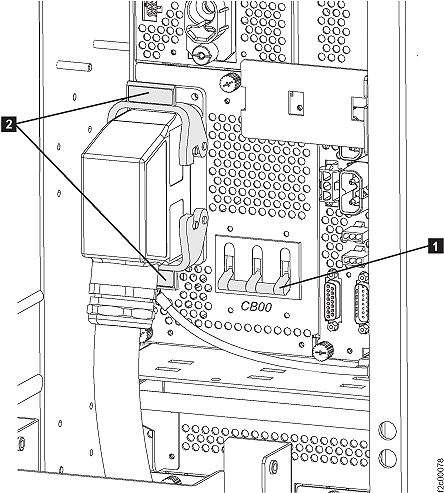
  7. Remove the tailgate frame bracket. Remove two screws Callout label 2. Loosen but do not remove two screws Callout label 1. Slide the bracket out.
    Figure 3. Tailgate frame bracket
    Tailgate frame bracket view
  8. At the PPS, unlatch the two retaining levers on the main line power cable and disconnect the cable. See Figure 2.
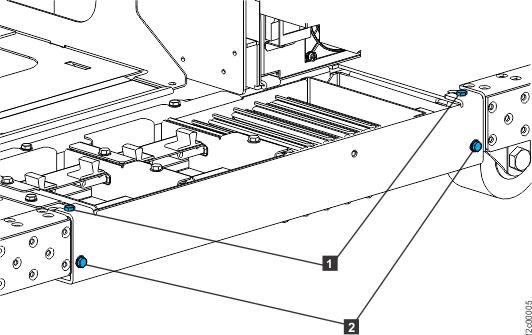
  9. Carefully pull the mainline cable away from the rack and the tailgate.
    Figure 4. Base rack power cables
    Base rack power cables
  10. Disconnect the customer end of the cable:
    • If the customer end of the cable has a connector fitting, disconnect it.
    • If the customer end of the cable is hard wired to the customer power, have the customer electrician disconnect it.

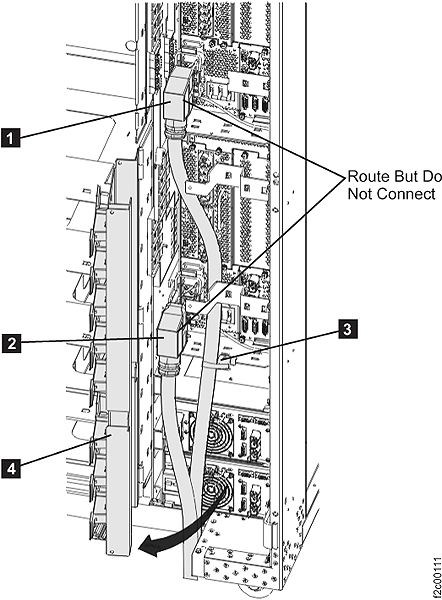
Install the main line power cable

About this task

Procedure

  1. Connect the main line power cable to the customer power.
    • If the customer end of the cable has a connector fitting, connect it.
    • If the customer end of the cable is hard wired to the customer power, have the customer electrician connect it.
  2. Route the cable through the tailgate Callout label 1. See Figure 3.
  3. Connect the mainline power cable to the PPS and ensure both latches are secure. See Callout label 2 in Figure 2.
  4. Instruct the customer to switch on the mainline circuit breaker that supplies mainline ac voltage to the power receptacle for the PPS that you are replacing.
  5. At the ac input power module, set the CB00 switch (Callout label 1, Figure 2) to on.
  6. Pivot the 208VDC bus bar gate closed being careful that both mainline power cables lay in the space between the two 208VDC bus bars. Fasten the gate shut with the two screws.
    Figure 5. Bus bar gate closing
    Bus bar door closing
  7. Reinstall the tailgate bracket with all four screws. See Figure 3.
  8. Exit this service information center parts exchange procedure and return to the procedure that sent you here.