Exchange the bus bar, 5/12V secondary lower
Before you begin
 Use approved ESD procedures to prevent damage.
About this task
Attention:
- This procedure is not a stand-alone procedure. Customer disruption and damage to the hardware might occur when microcode and power boundaries are not in the proper conditions for this service action.
- If a serviceable event FRU repair directed you to this procedure, the microcode and power boundaries are already set.
- If a serviceable event FRU repair did not direct you to this procedure, see MAP1230 Replace a FRU without using a serviceable event.
Notes:
Decide if you are going to remove the upper or the lower
bus bars and select the condition that applies:- This procedure is disruptive and requires you to power off the storage facility.
- All the cables and FRUs to be removed must be uniquely identified so they can be reinstalled correctly.
- If an installed earthquake resistance kit prevents you from accessing this FRU, refer to MAP1600.
- You are here to replace a bus bar in the lower half of an expansion rack, go to step 1.
- You are here to replace a bus bar in a base rack, go to Exchange the bus bar, 5/12V secondary upper.
- You are here to replace a bus bar in the lower half of an expansion rack, go to Exchange the bus bar, 5/12V secondary upper.
Remove the bus bar, 5/12V secondary lower
Procedure
- Set the local/remote switch card white switch
 to Local (down). This will prevent
the rack from being unexpectedly powered up by the management console (or remote
power control if the feature is installed). See Figure 1.
to Local (down). This will prevent
the rack from being unexpectedly powered up by the management console (or remote
power control if the feature is installed). See Figure 1. Figure 1. Location of the local remote switch card and the zSeries local remote switch card 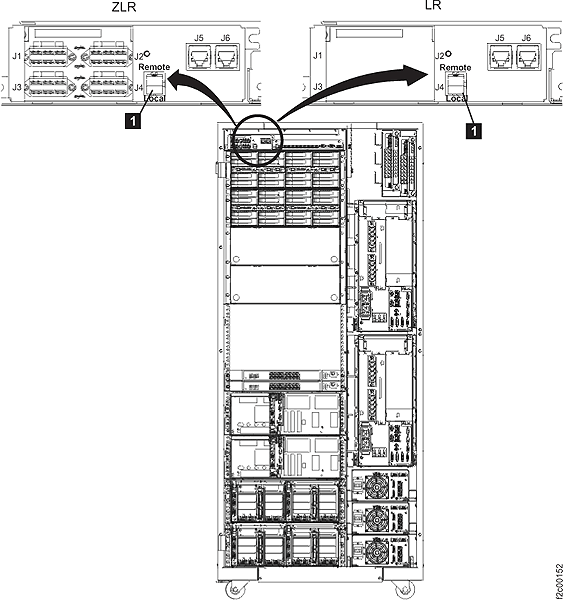
-
Does the rack that you are repairing contain an integrated management console? See Figure 2.
Figure 2. Visual overview of Model 941 Rack-1, front 
- Yes, go to the next step.
- No, go to the 208 VDC bus bar gate to service position instructions in step 9.
-
Open the 208 VDC bus bar gate to service position. See Figure 3.
-
Remove the two screws and open the 208 VDC bus bar gate
 to the
service position.
to the
service position.
Figure 3. 208VDC bus bar gate service position 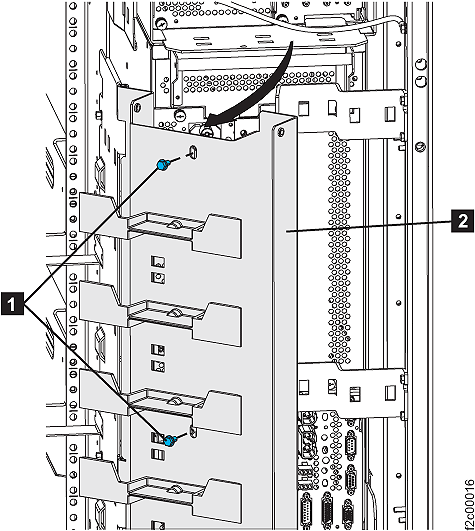
-
Remove the two screws
- Remove power and mainline power cord from the PPSs.
- At both PPSs, set
the PPS ac
input power module CB00 switch to Off (down).
- At both PPSs, disconnect
the mainline power cord from the PPS ac input
power module. Push the two release levers .
Figure 4. Power supply main line CB00 switch 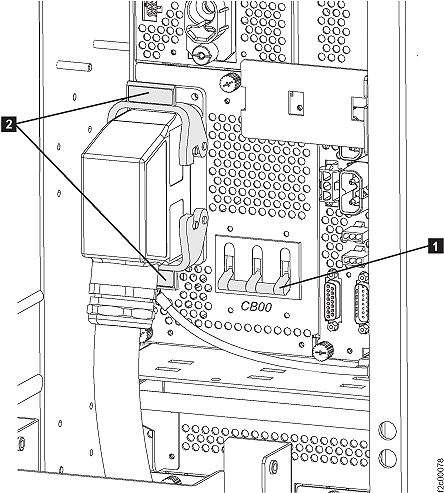
- Remove the cable ties securing the mainline power cable
to PPS-2 (lower PPS). See Figure 5.
- Remove the screw and mainline power cable bracket . See Figure 5.
Figure 5. Power supply main line 
- At both PPSs, set
the PPS ac
input power module CB00 switch
- Put PPS-2 (lower) in service position 2.
- At the front of the rack, remove the eight black hex
head screws that fasten the PPS-1 chassis to the
rack. See Figure 6.
Figure 6. PPS chassis remove 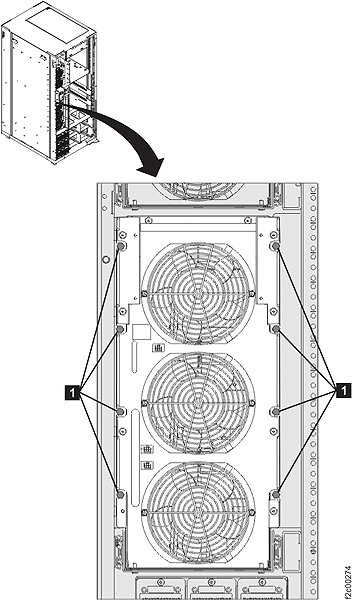
- Slide PPS-2 out to service position 2. The PPS rail
detents will click at service position 1 and then will prevent the PPS from
being pushed back in to the normal position. See Figure 7.
Figure 7. PPS service position 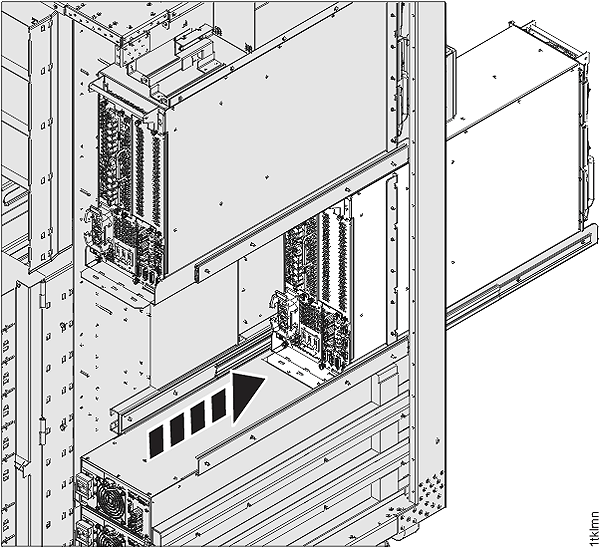 Note: To allow the PPS to be pushed back in, you must pull the PPS out to service position 2 (fully extended), release both slide detents and then push the PPS chassis
in fully.
Note: To allow the PPS to be pushed back in, you must pull the PPS out to service position 2 (fully extended), release both slide detents and then push the PPS chassis
in fully.
- At the front of the rack, remove the eight black hex
head screws
- At the front of the rack, remove the two screws securing the PPS to the
sheet metal tray . See Figure 8.
Figure 8. PPS sheet metal screws 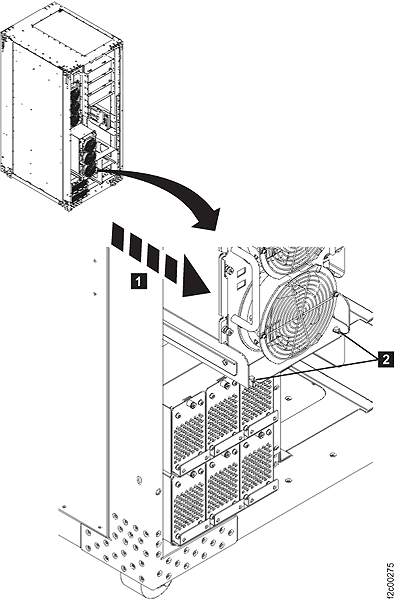
- Pull the PPS out about 5 cm (2 inches) further on the
sheet metal tray as shown. (This will give more clearance at the back
of the PPS for
the next step.) See Figure 9.
Figure 9. Sliding PPS out on sheet metal tray 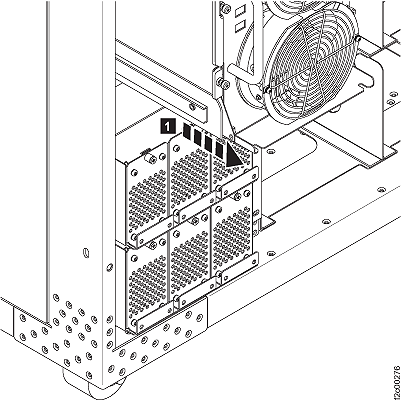
- Remove the primary to secondary tie bars. See Figure 10.
- At the rear of the rack, remove the lower primary to
secondary tie bar plastic cover. Loosen but do not remove the two
screws .
- The plastic cover has keyhole slots. The cover has tabs
that slide behind the lower and low tie bar. Slide the cover up , and then remove it.
Figure 10. Bus bar cover 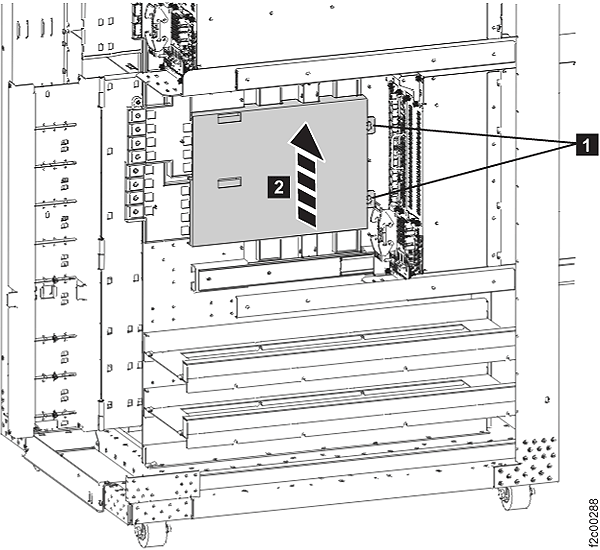
- Remove the bolt securing each end of each lower tie
bar and remove the tie bars . See Figure 11.
Figure 11. Lower tie bars 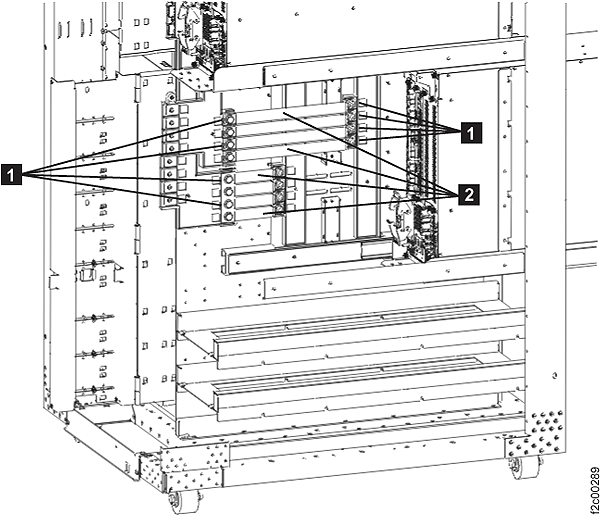
- At the rear of the rack, remove the lower primary to
secondary tie bar plastic cover. Loosen but do not remove the two
screws
- Remove two storage enclosures (if installed).
- At the rear of the rack, remove the middle two storage
enclosures (if installed) in the lower half of
the rack. See Figure 12.
Figure 12. Middle storage enclosures 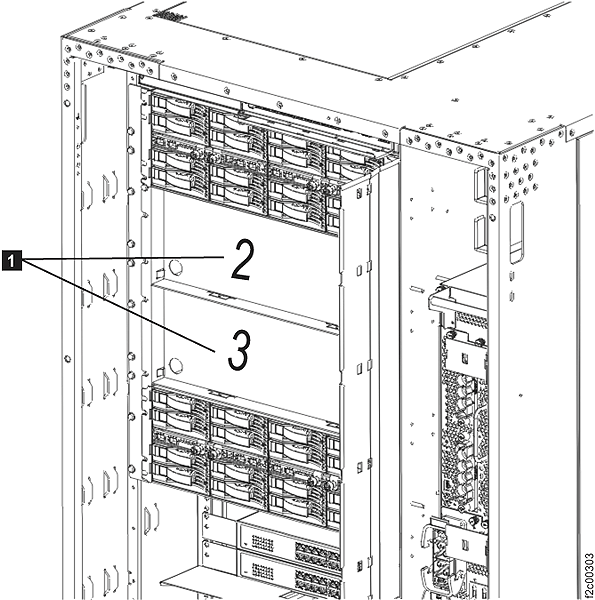
- Each storage enclosure, disk drive module (DDM) , fiber channel interface card and FC-AL cable
 must be in the exact same position
when reinstalled in later steps. See Figure 13
must be in the exact same position
when reinstalled in later steps. See Figure 13 - Observe the cable labeling to ensure you will be able
to replug the cables correctly. Disconnect the FC-AL cables from the two fiber channel interface
cards (FCIC) . Squeeze the top of the FC-AL cable
connector to release it from the FCIC card. Note: There are four FC-AL cables if this is the last storage enclosure in this group. There are eight FC-AL cables if this is not the last storage enclosure in this group.
- Remove the four screws
 fastening the storage enclosure to
the rack mount rails.
fastening the storage enclosure to
the rack mount rails. Figure 13. DDM Fibre Channel cable 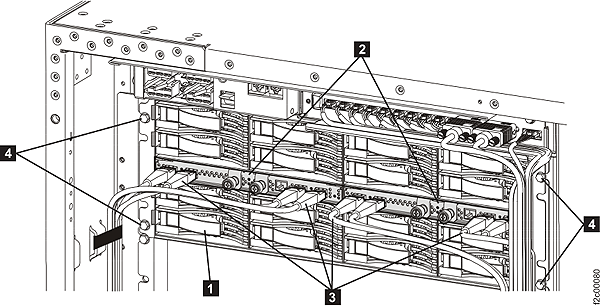
- At the rear of the rack, remove the middle two storage
enclosures
- Remove the 5/12V secondary bus bar. See Figure 14.
- Disconnect the four storage enclosure power cables from
the secondary bus bar. Squeeze the top and bottom release levers on
the cable connector and then pull to release. The front storage enclosure
cables connect to the front 5/12V secondary
bus bar A. The rear storage enclosure cables connect to the front 5/12V secondary
bus bar B.
- Remove the nuts and washers fastening the bus bar to the rack
and then remove the bus bar.
Figure 14. Storage enclosure cables to bus bar 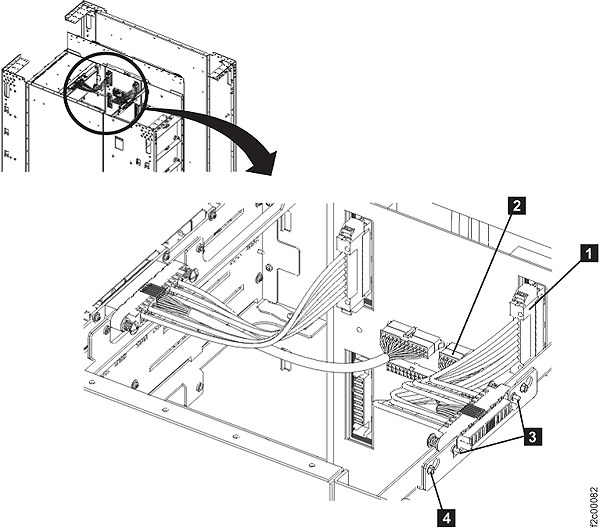
- Disconnect the four storage enclosure power cables from
the secondary bus bar. Squeeze the top and bottom release levers on
the cable connector and then pull to release. The front storage enclosure
cables
Install the bus bar, 5/12V secondary lower
Procedure
- Place PPS-2 in the normal position:
- At the front of the rack, push PPS-1 fully in on the
sheet metal tray and install the two screws . See Figure 8.
- At the front of the rack, push PPS-1 fully in on the
sheet metal tray and install the two screws
- Put the PPS back
to the normal position: Note: To allow the PPS to be pushed back in, you must pull the PPS out to service position 2 (fully extended), release both slide detents and then push the PPS chassis
in fully.
- Power on the rack:
- Set the local/remote switch card white switch to Remote (up). See Figure 1.
- Use the management console to power on the storage facility subsystem.
- Set the local/remote switch card white switch